Shipment scheduling tool
Scheduling shipments from the scheduling tool helps you plan resources and maintain an overview of all inbound and outbound shipments.
The schedular can be used in:
Shipment overview, for a specific location, planning warehouse resources
Shipment project dashboard, scheduling all shipments of a project (inbound and outbound)
Slot booking
Creating a scheduler view
You can create specific scheduling views based on a location query in the shipment overview. To make such a view, hit the gear icon on the shipment overview page.
On the page, you can add/remove fields and add filters. For the view to become a scheduled view, you should at least add a filter for a location. To do so, click the add filter button

then select pickup or delivery address from the dropdown.
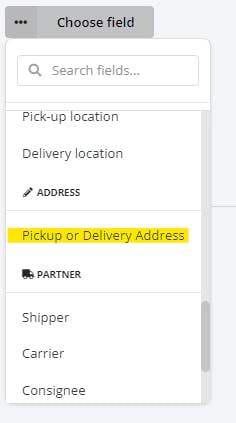
Click on the add address button and a modal pops up to allow you to select an address. You can add multiple addresses for the view.

Based on the address, the scheduler will determine if it is a pickup or a delivery location. Optionally you can select additional fields on the left-hand side that will be available in the scheduling tool.
Next, you can save the view. Please note:
the view should be live, so make sure that checkbox is on
If you have a global view selected, you will need to save as a new view.
you can share the view in the organization by clicking the shared checkbox
Once you hit save, the calendar view is available.
The Scheduling tool
When you select a saved view that is available for scheduling (the filter on the location is available, and it is a live view), instead of a list, you will see the week with different blocks. Each block represents a shipment:
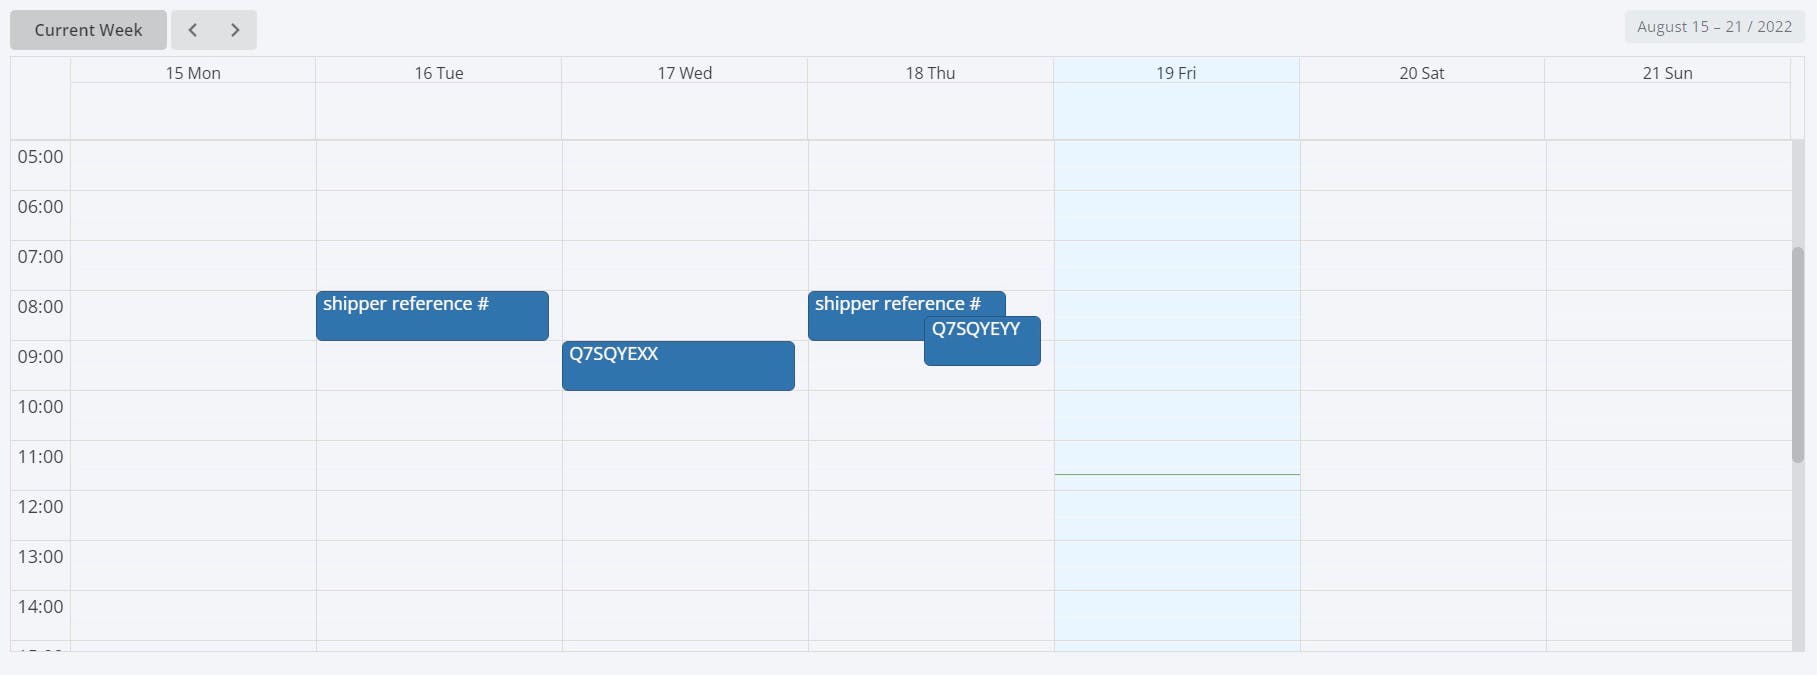
You can switch the view by hitting the toggle on the top right which allows you to view the shipments in a list or a scheduling view.
Hovering over a shipment will show all relevant information. Depending on the field selection in the view settings, more or fewer fields are shown.
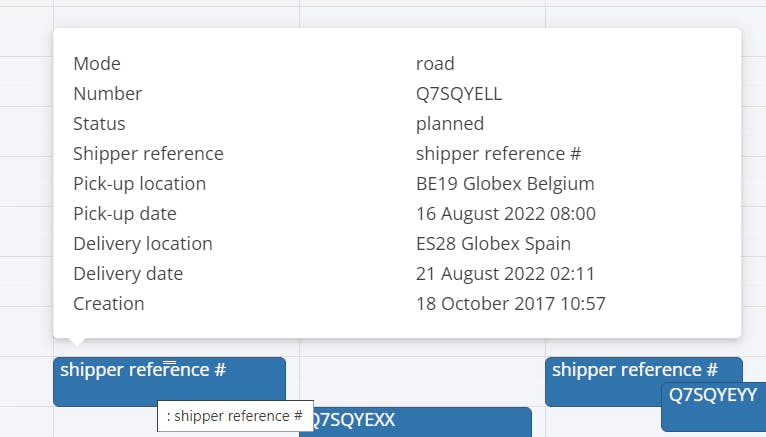
A shipment block can have 2 colors:
Blue: it is an outbound shipment
Green: it is an inbound shipment
Interacting with the schedule
Double-clicking on a block will bring you right to the shipment page. If the context allows it, you can drag a shipment or stretch a shipment. On the top left of the scheduling tool, you see three buttons: current week, a back and forward button. These buttons allow you to navigate back and forward.
Important consideration: the scheduling view is only allowing you to see shipments from the last 30 days in the live view.
Scheduling shipments
Depending on the status of a shipment, you can drag shipments or stretch blocks to reserve more or less loading/unloading time.
you can drag shipments when:
shipment is draft or planned, for both pickup and delivery location (inbound or outbound)
shipment is started, for delivery location only (as the shipment has left the pickup location)
you can stretch shipments when they are in the planned or started status. Note: shipment in draft status can't be stretched
When you drag or stretch, the dates are updated in the database and are reflected in the shipment as well.
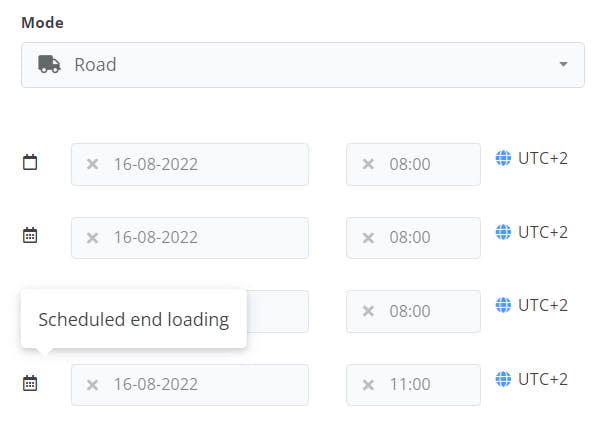
When in draft status, dragging updates the planned dates, when in planned or started, the scheduled dates are updated.
For dragging, you can click and hold an event, and move the event to a different position. For stretching, grab the stretch bars on top and bottom for manipulation.
Once you complete the action, the dates are stored in the database.
Scheduling Project shipments
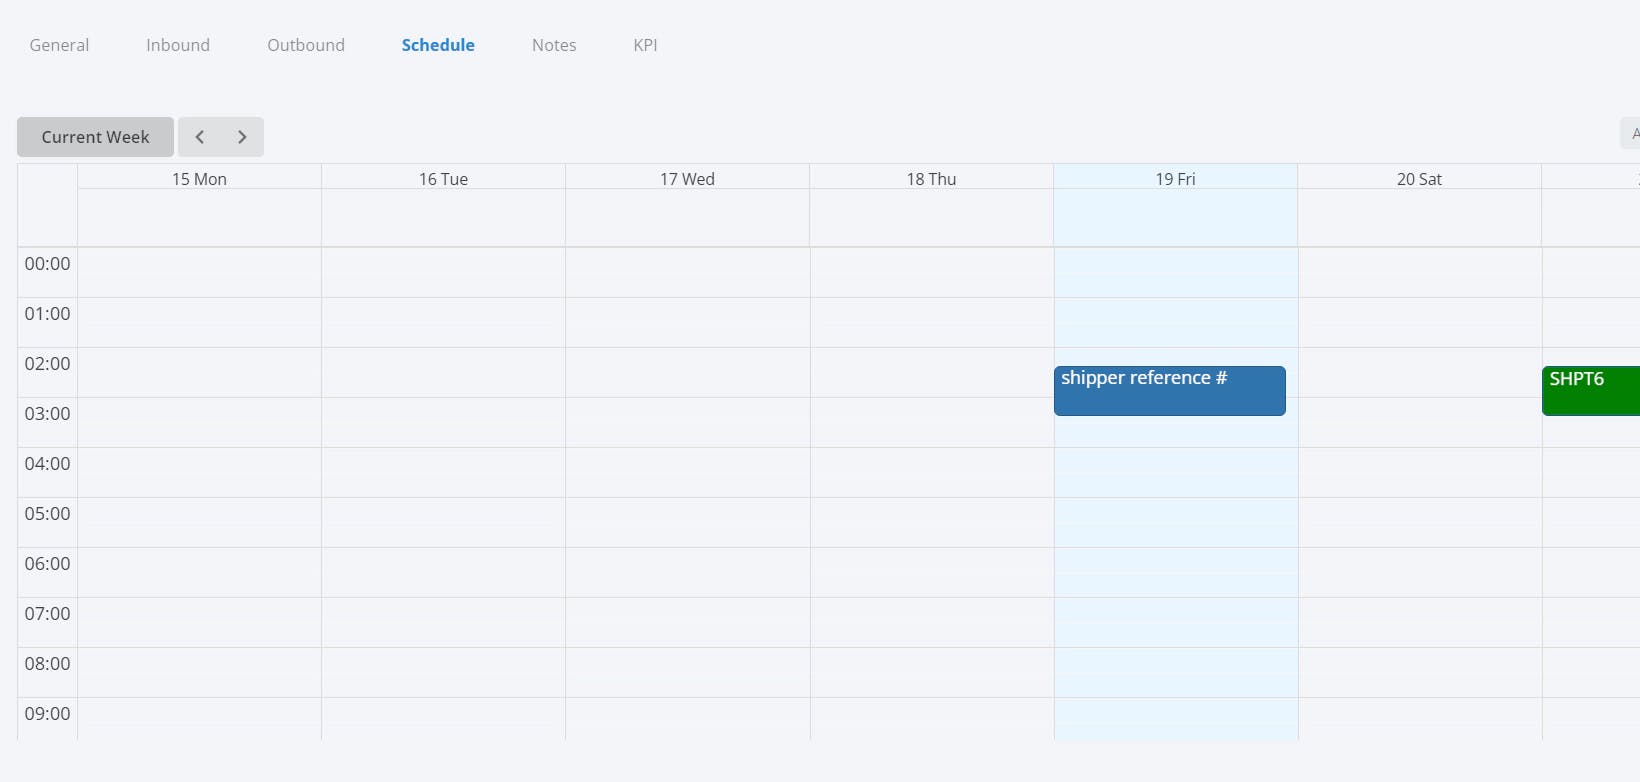
When managing shipments for a project, you can view the schedule for the project in the schedule tab. The schedule will show all shipments for the applicable period/ Again, shipments are colored according to outbound (blue) and inbound (green) context.
The project schedule defaults the period to the week of the event, as determined by the event date field on the general tab. Again, you can navigate backward and forwards using the buttons on the top left.
In a shipment project, partners will only see their shipments.